Using the symbols you've created so far, assembling the movie's content is easy. As you do this, you will learn more about using layers to organize the content of a movie.
| 1 | Choose Edit > Edit Movie. |
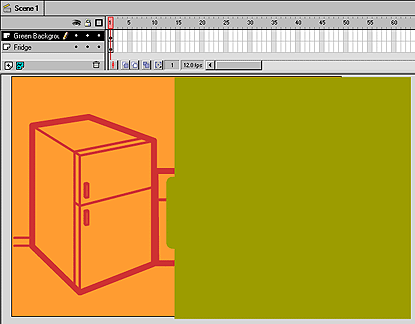
| 2 | Name the first layer in the Timeline "Fridge." |
| 3 | Drag an instance of the BACKGROUND - FRIDGE symbol from the Library window onto the Stage. |
| 4 | In the Timeline, insert a new layer above the Fridge layer and name it "Green Background." |
| 5 | Make sure the Green Background layer is selected, and then drag an instance of the BACKGROUND - GREEN symbol onto the Stage.
|
Now, add the animated buttons you created.
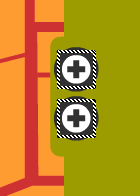
| 1 | Insert a new layer and name it "Buttons." Make sure it is the top layer in the Timeline. |
| As you add layers, you'll want to be able to see all of them in the Timeline. | |
| 2 | Drag the lower border of the Timeline window so that all of the layers are visible.

|
| 3 | Select the Buttons layer and drag an instance of the BUTTON - HOME symbol onto the Stage. |
| Because buttons respond differently to the mouse than other objects do, you need to disable buttons before you can select them and make changes. After you finish working on buttons, you can enable them again. | |
| 4 | Choose Control > Enable Buttons and make sure that Enable Buttons is not checked. |
| 5 | Select the instance of BUTTON - HOME and move it into position. |
| 6 | Make sure the Buttons layer is still selected in the Timeline, and then place an instance of the BUTTON - CONTACT symbol below the BUTTON - HOME instance on the Stage. |
| 7 | To align the buttons, click BUTTON - CONTACT and hold down the Shift key as you click BUTTON - HOME to select both buttons. Choose Modify > Align and choose the horizontally left-aligned option.
|
| 8 | Choose Control > Test Movie to see the buttons animate when you roll the mouse over them. |
| After the movie plays, close the test window to continue working in the movie. | |
Now add the INTRO - ANIMATION movie clip you created.
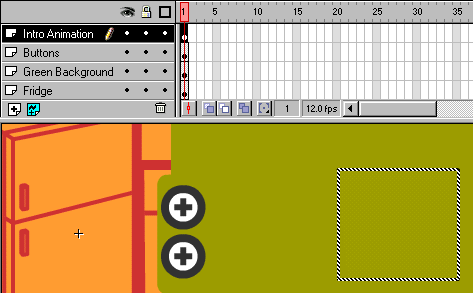
| 1 | Insert a new layer in the Timeline and name it "Intro Animation." Make sure it is the top layer. |
| 2 | Lock the other layers to make sure you're working only in the Intro Animation layer. |
| 3 | Drag an instance of the INTRO - ANIMATION symbol from the Library window onto the Stage. |
| Remember that the photograph image is completely transparent in the first frame on the movie clip, so the only visible part of INTRO - ANIMATION is the registration point. | |
| 4 | Move the INTRO - ANIMATION instance so that its registration point is over the refrigerator.
|
| Remember that movie clip animation does not run in the authoring environment. | |
| 5 | Choose Control > Test Movie to see the movie with the animation working. |
| The animation only runs the first time the movie runs the test window. To see the animation again, close the test window and choose Control > Test Movie again. | |
| When you finish viewing the animation, close the test window to continue working in the movie. | |
The buttons you've added are supposed to make the text content appear in the green area on the right. Now you're ready to add the text content to the movie.
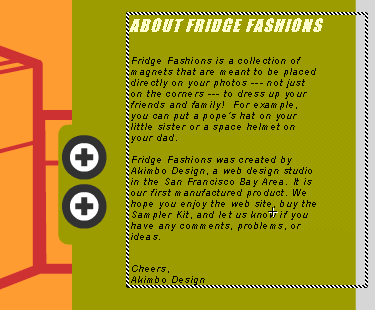
| 1 | Insert a new layer at the top of the Timeline and name it "Text Home." |
| 2 | Select the keyframe in frame 1 of the Text Home layer and drag an instance of the TEXT - HOME symbol onto the Stage. Fit the symbol in the green area as shown here:
|
| 3 | To make it easier to see what you're doing, click in the Eye column of the Text Home layer to hide it before you add the next layer.

|
| A red X appears to show that the layer has been hidden. | |
| 4 | Insert a new layer at the top of the Timeline and name it "Text Contact." |
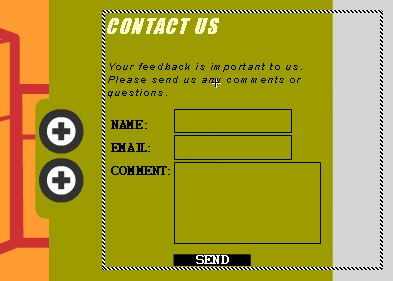
| 5 | Select the keyframe in frame 1 of the Text Contact layer and drag an instance of the TEXT - CONTACT symbol onto the Stage so that it fits in the green area.
|